Quick Start Guide
Job Setup
You’re now ready to begin creating and promoting your first job! A “job” within PhotoDay is any picture day shoot, its associated information, the photos it will eventually include, and any promotional flyers created for that specific job.
A job acts as the “behind-the-scenes” set up for a customer-facing gallery.
Adding a New Job
Head to the Jobs section to get started. This is where every job you create will be listed, along with its associated information, such as its access code, gallery type, date of the shoot, and more.

To create a new job, click the Add New button on the top right of the page. This will open the Job Information window, prompting you to name your job and choose a job category from the drop-down menu.
Next, associate it with an organization, set the picture day date, and the time zone in which this job will take place. You can also upload a job logo (learn more).
Finally, choose if you want to enable or disable FaceFind. FaceFind can take care of matching subjects to streamline your back-end workflow and create an amazing shopping experience for your customers. Learn more.
When you’re happy with your job settings, click the Create button (you can always update these settings within the job later). This will open the newly created job’s Dashboard page.
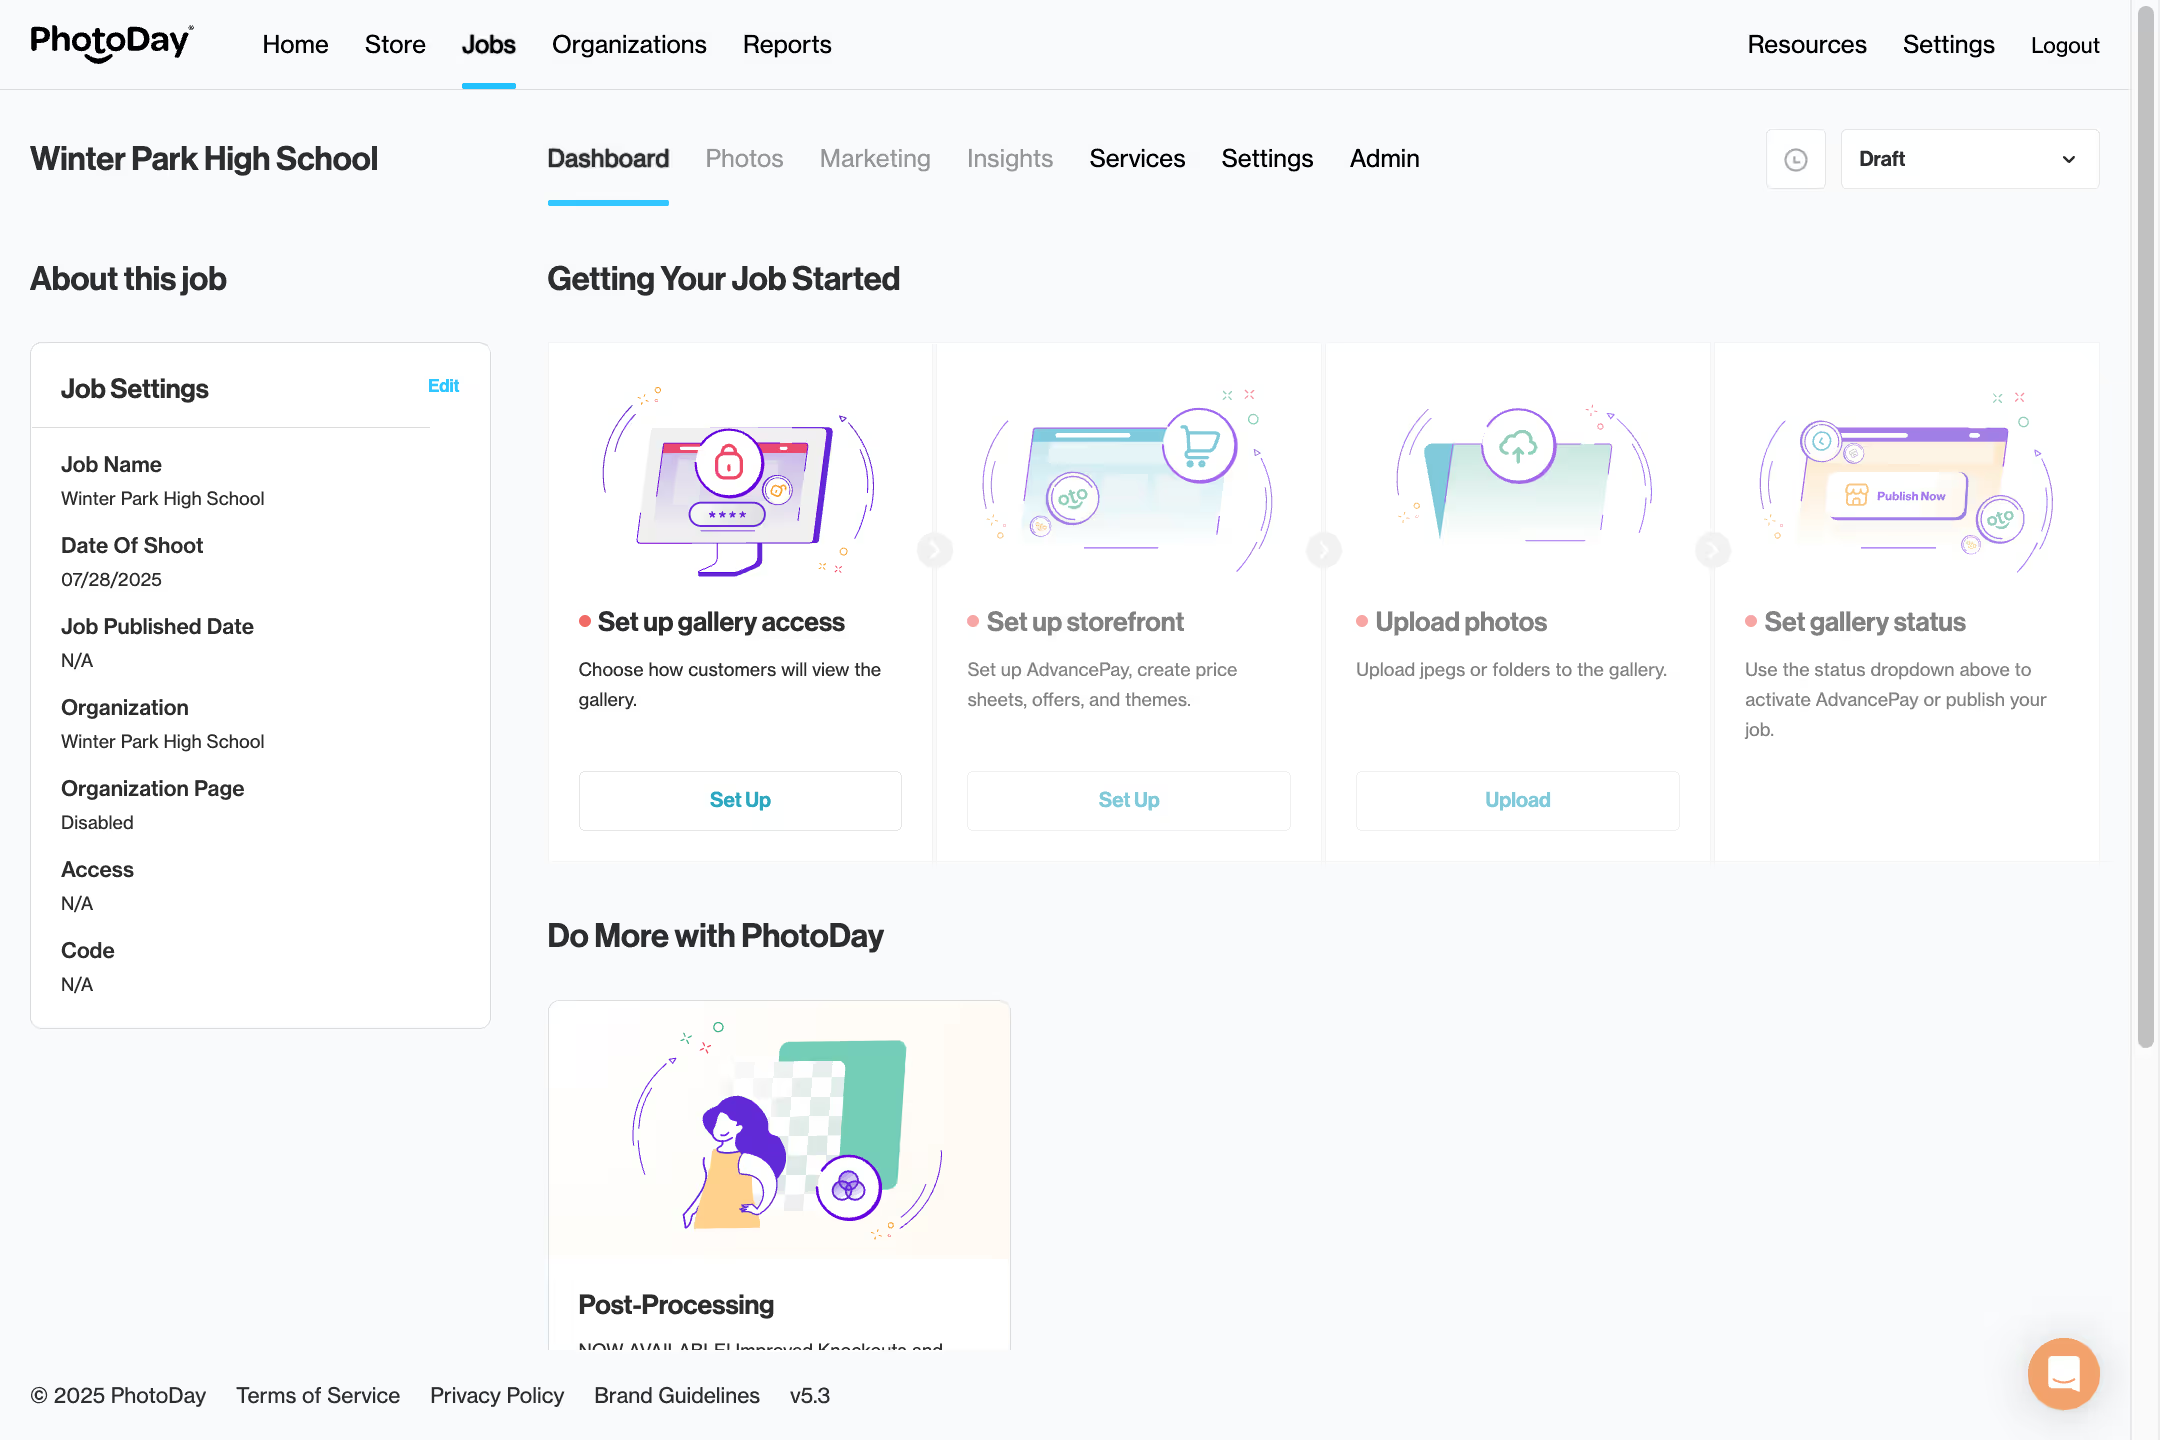
This Dashboard section will walk you through the creation process, from selecting the gallery type to publishing. To get started, click the Set Up button, which will take you to our next section.
Set Up Gallery Access
We know that different jobs have different security and access needs. PhotoDay's three different gallery types give you full customization of how customers access and view their photos. Head to Job > Settings > Gallery Access.

Private Galleries are for when you want every subject to have their own private gallery access code within one main job. Private gallery jobs work side-by-side with the PhotoDay Capture app by using subject data and reference photos to automatically create private sub-galleries for each individual photographed.
Public Galleries are for when you want to provide open access to all of the subjects. A public gallery can be viewed via a direct link and does not require an additional access code to enter.
Group Galleries are for when you want to have one group access code. A group gallery has one access code that’s required to enter the gallery, but all participants can see all of the photos.
Learn more about PhotoDay’s different gallery types and how to find your perfect fit! You can view customer-facing examples of each gallery type here.
When you select a gallery type, some customization options will appear regarding customer access/opt-in codes and expiration dates.
Note: Once a gallery type is selected and saved, it cannot be changed. Don’t press the blue Save button until you’re ready to lock in this job’s gallery type.
For both public and group galleries, you will also see a Gallery Search Methods section. There are three ways for customers to find their photos in a group or public gallery: FaceFind, Tags, All Photos. You have the freedom to choose any combination of these search options. Learn more.
Determining what kind of gallery is best for your picture day is up to you, but once you’ve decided, click the blue Save button.
Note: Once a gallery type is selected and saved, it cannot be changed.
Set Up Job Storefront
From the job’s Dashboard page, the next step is to set up your storefront. Clicking this will take you to Job > Settings > Store.
Here you can attach your price sheets, offers, and AdvancePay options, as well as any theming for special products.
The Products section is where you can select the price sheet you wish to attach to this job.
Once your price sheet is attached, that lab’s theming options will populate below. Choose which themes apply to this job—you can choose more than one! This determines specialty product theming options for your customers to choose from.
Note: You must choose at least one theme, but if you don’t have any applicable specialty products added to a price list, no themes will be presented to your customers.
PhotoDay also allows you to upload your own custom themes. Learn more about creating, uploading, and selecting custom themes.
Clicking Save will take you back to the job’s dashboard page, but before the next step (uploading photos), let’s go back to the Settings tab.
More Job Settings
The first section of Job > Settings is the Job Details section. Here you can edit the initial information you entered when first adding your job.
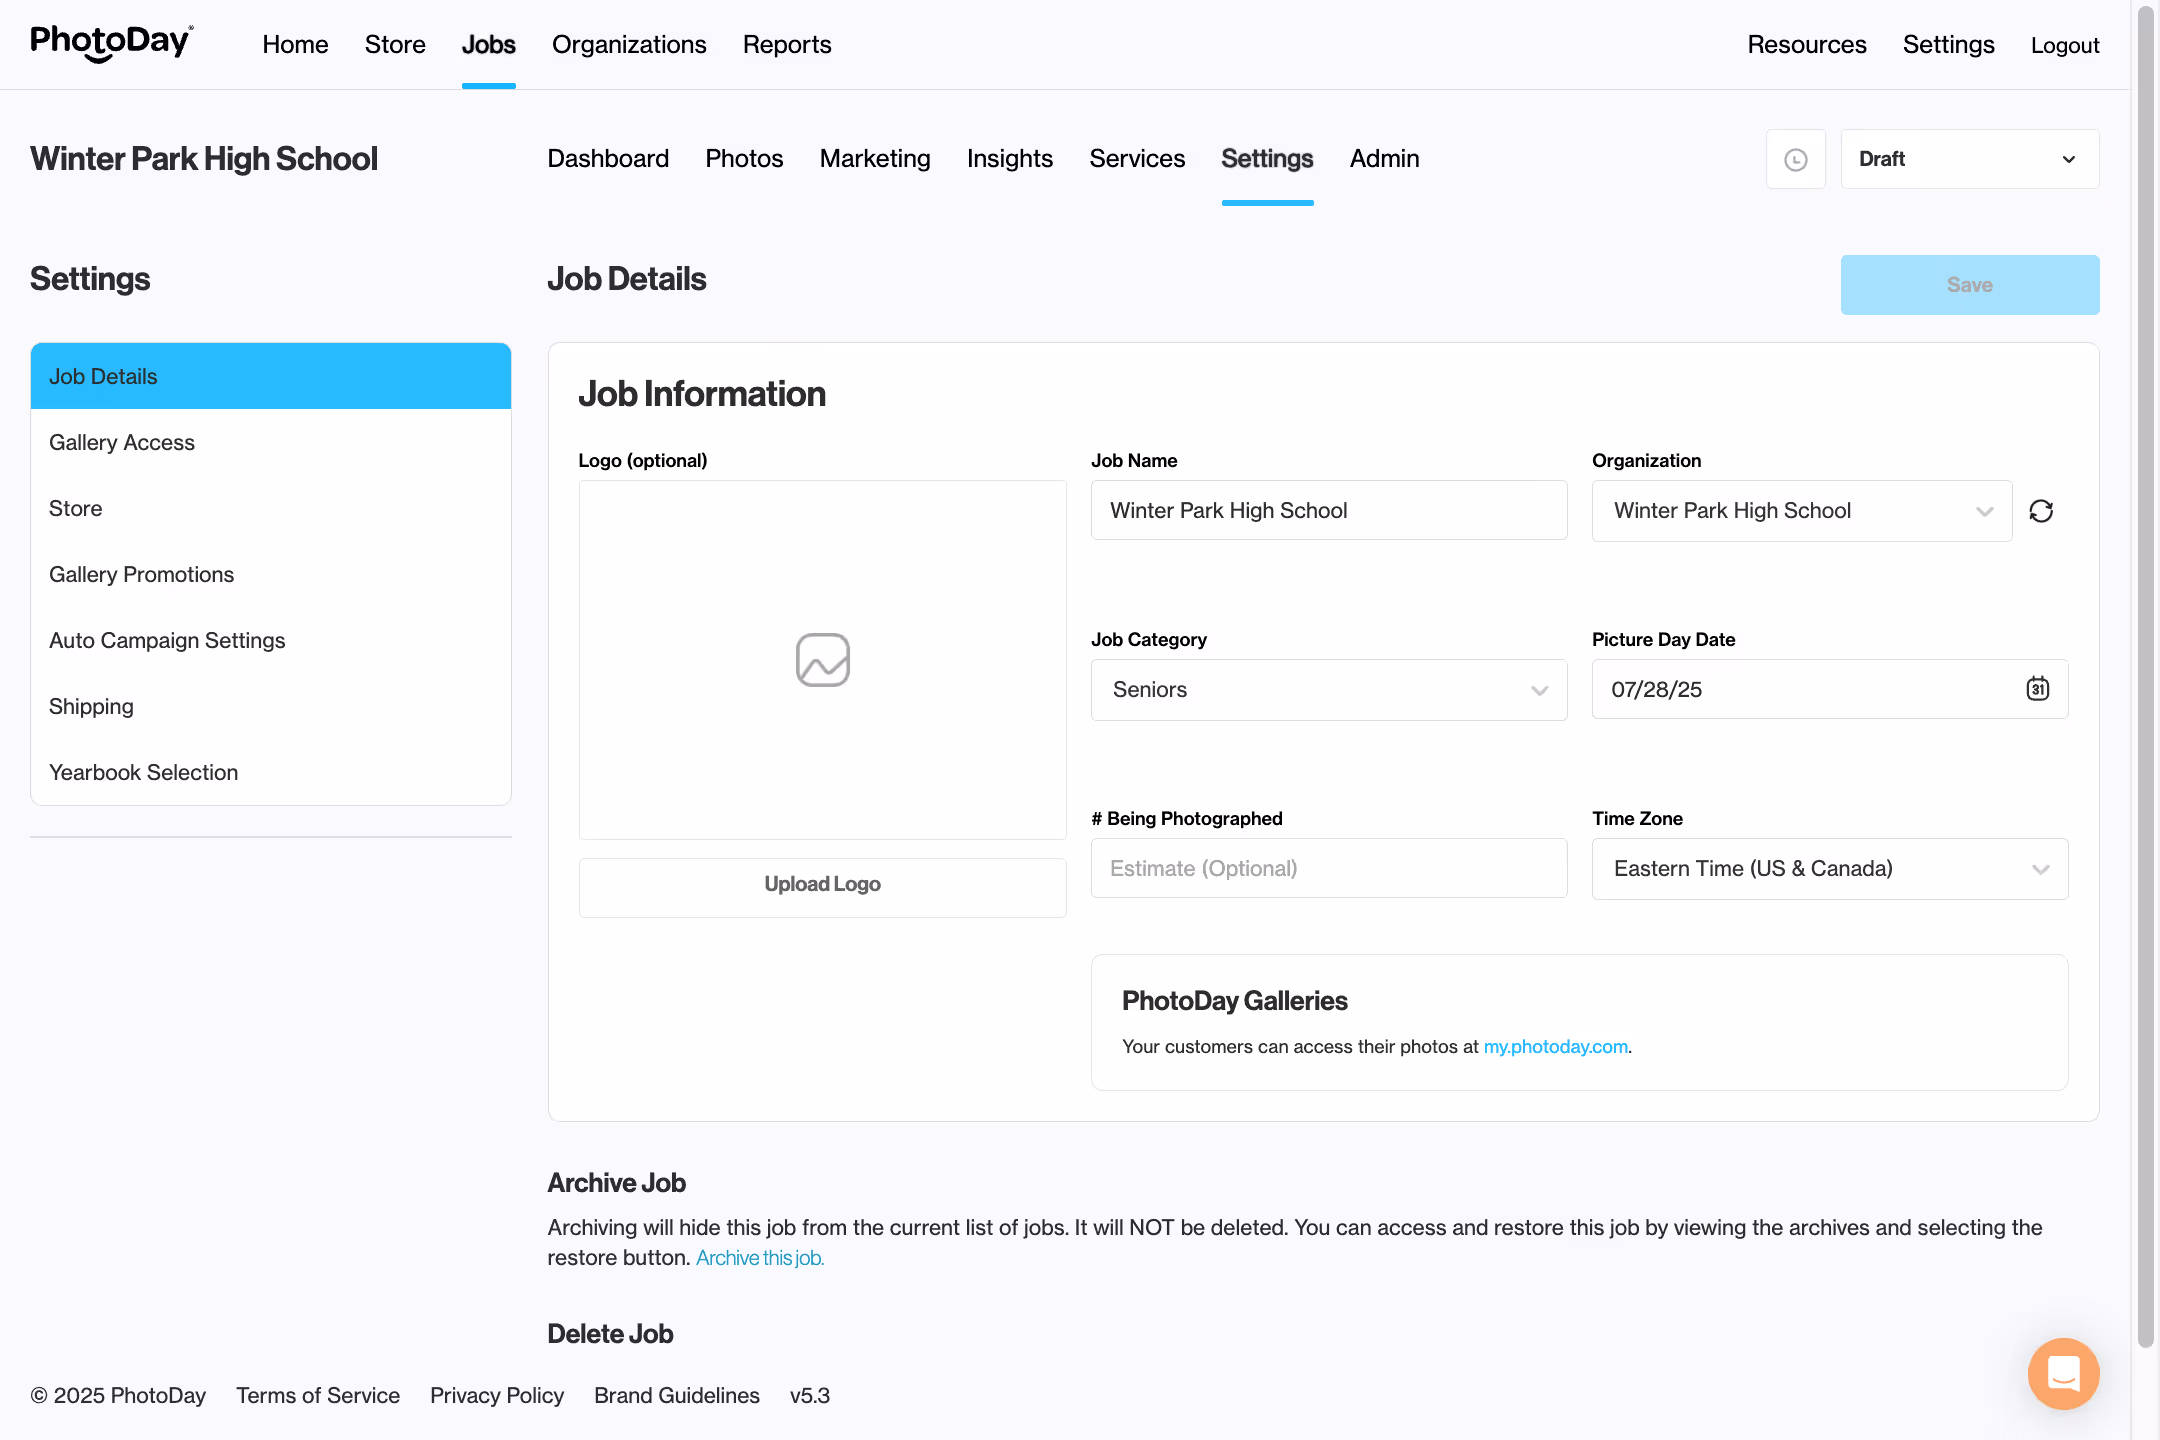
Jobs set to Group or Public Access will also have the Gallery Search Options section below the Job Information section. Learn more.
The Gallery Promotions section is where you can set up a Gallery Offer (learn more in the Creating Offers section).
The Auto Campaign Settings section will direct you to Job > Marketing, where you can review and edit the email and text campaigns sent to your customers. We’ll cover this soon in Promoting Your Gallery.
Next up is the Shipping section. If the attached price sheet is for drop and bulk shipping, you will be able to toggle between the two tabs.
If the attached price sheet is for drop shipping, you will see the lab shipping rates under the Drop Ship tab.
If the attached price sheet is for bulk shipping, you will see the Bulk Ship tab.

Here you can review the lab shipping information and enter the necessary details. Learn more about bulk shipping.
If you’re using Custom Themes (learn more) or Backgrounds (learn more), you’ll see two more tabs.
Gallery Status
The last thing we need to cover in this section is gallery status. The status of your gallery dictates how it’s visible to you and your customers. You can change a gallery’s status using the drop-down menu in the top right corner of a job.
There are six possible states in which your gallery can exist:
Draft: When you first create a job, the gallery exists in Draft status by default. Customers cannot see photos or products or purchase AP credits, but they can still subscribe to gallery notifications.
AdvancePay: If you’re ready for customers to start purchasing AdvancePay credits, make sure you create and attach an AdvancePay credit sheet to your job, then select this status.
Published: When your photos are uploaded and ready to share, you can choose Publish Now, making the gallery visible to your customers. PhotoDay’s automated campaigns will start sending, notifying subscribed customers that their photos are ready. Learn more.
Publish Later: Ready to publish, but want to choose a specific time? With the Publish Later option, you can select the day and time you’d like the gallery to publish.
Archived: Archiving a job removes it from your current list of jobs without deleting it from your account, so it can be restored at any time.
Expired: If you set an expiration date for your gallery (Job > Settings > Gallery Access > Expiration Date), it will automatically unpublish and switch back into draft. Customers will no longer be able to view the gallery and will be directed to contact the studio if they attempt to view it.[n]
Learn more about when to use each gallery status and how they correspond to PhotoDay’s automatic customer communications.